Tag: Visual edit |
(→Starting Deck: Minor corrections.) Tag: Visual edit |
||
| (27 intermediate revisions by 17 users not shown) | |||
| Line 1: | Line 1: | ||
| ⚫ | |||
| − | ''"A deadly huntress from the foglands. Eradicates foes with daggers and poisons"'' |
+ | <div align="center">''"A deadly huntress from the foglands. Eradicates foes with daggers and poisons"'' |
| ⚫ | |||
| + | {{Icon|<G>}} |
||
| − | The '''Silent '''is one of three playable characters in Slay the Spire. She is themed on a rogue fantasy build. |
||
| + | </div> |
||
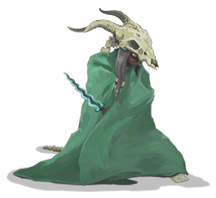
| + | The '''Silent '''is one of four playable characters in Slay the Spire. She is a huntress themed on a rogue fantasy build. This cunning character weakens her foes with numerous cuts and poison, while using cheap tricks and agility to avoid their attacks. With many powerful cards that draw and discard, the Silent ensures that she will always be one step ahead of her enemy. She starts with a relatively low 70 hp. |
||
| ⚫ | |||
| ⚫ | |||
| − | [[Silent Cards|For the Silent's full list of cards, click here]]. |
||
| − | == |
+ | ==Cards== |
| + | ===Starting Deck=== |
||
* 5 {{C|Strike_G|Strikes}} |
* 5 {{C|Strike_G|Strikes}} |
||
* 5 {{C|Defend_G|Defends}} |
* 5 {{C|Defend_G|Defends}} |
||
* 1 {{C|Survivor}} |
* 1 {{C|Survivor}} |
||
| − | * 1 {{C|Neutralize}} |
+ | * 1 {{C|Neutralize}}<br> |
| + | {{Silent Card Navbox}} |
||
== Strategy == |
== Strategy == |
||
| − | Unlike [[Ironclad|the Ironclad]], the |
+ | Unlike [[Ironclad|the Ironclad]], the Silent does not get any healing whenever she finishes combat. Therefore she is often more focused on {{KW|Block}}, and gaining explosive advantage so that she can end the encounter faster. Many of her cards give additional {{KW|Energy}} and card draw, allowing her to chain momentum together to overcome the lack of built-in healing. |
=== Starting Deck === |
=== Starting Deck === |
||
| − | The Silent's starting deck is the largest of the |
+ | The Silent's starting deck is the largest of the 4 characters, at 12 cards, compared to the Ironclad's, Defect's and Watcher's starting deck, each of which have 10 cards. This means more Strikes and Defends are encountered in Act 1, and it's slightly more difficult to remove all starting cards from The Silent's Deck. |
| − | The Silent's starting deck is also the cheapest, with |
+ | * The Silent's starting deck is also the cheapest, with its 2 non-Strike non-Defend cards costing 1 and 0. This means it's easier to take strong 2-cost card options earlier in the game, such as {{C|Dash}}, {{C|Predator}}, and {{C|Leg Sweep}}. |
=== Starting Relic === |
=== Starting Relic === |
||
| − | The Silent's starting Relic, {{R|Ring of the Snake}} |
+ | The Silent's starting Relic, {{R|Ring of the Snake}} ensures that the first turn of every fight is slightly stronger than all of the other turns. This makes Innate cards slightly better for Silent since they only take up 1 of 7 cards instead of 1 of 5 cards. |
=== General Build Archetypes === |
=== General Build Archetypes === |
||
These are the standard types of decks that may give you an idea of direction for your deck, or what you want to go for. Keep in mind that none of these builds are mutually exclusive. Many of them are more of a general strategy, which can be adapted or combined into multiple builds in a single deck |
These are the standard types of decks that may give you an idea of direction for your deck, or what you want to go for. Keep in mind that none of these builds are mutually exclusive. Many of them are more of a general strategy, which can be adapted or combined into multiple builds in a single deck |
||
| + | {| class="mw-collapsible mw-collapsed" data-expandtext="▼" data-collapsetext="▲" style="border: 0px solid black; width: 100%;" |
||
| − | ==== '''Defensive/{{KW|Block}} Builds''' ==== |
||
| + | ! style="background-color: transparent; border: solid #008060; color: #008060; border-width: 0px 0px 1px 0px;" |<div style="color:#A1EC4C">{{KW|Block|Defensive}} Deck</div> |
||
| ⚫ | |||
| + | |- |
||
| ⚫ | |||
| + | | style="background-color: transparent; border: solid #008060; border-width: 0px 0px 1px 0px;" | |
||
| ⚫ | |||
| ⚫ | |||
| ⚫ | |||
| ⚫ | |||
| ⚫ | |||
| ⚫ | |||
| ⚫ | |||
| ⚫ | |||
| ⚫ | |||
| ⚫ | |||
| ⚫ | |||
| ⚫ | |||
| ⚫ | |||
| ⚫ | |||
| ⚫ | |||
| ⚫ | |||
| + | |- |
||
| + | |} |
||
| + | {| class="mw-collapsible mw-collapsed" data-expandtext="▼" data-collapsetext="▲" style="border: 0px solid black; width: 100%;" |
||
| − | ==== '''{{KW|Poison}} Builds''' ==== |
||
| + | ! style="background-color: transparent; border: solid #008060; color: #008060; border-width: 0px 0px 1px 0px;" |<div style="color:#A1EC4C">{{KW|Poison}} Deck</div> |
||
| ⚫ | |||
| + | |- |
||
| ⚫ | * {{C|Noxious Fumes}} |
||
| + | | style="background-color: transparent; border: solid #008060; border-width: 0px 0px 1px 0px;" | |
||
| ⚫ | |||
| ⚫ | {{KW|Poison}} Builds use {{KW|Poison}} stacks as their main source of damage. With the right cards, you can ramp up {{KW|Poison}} stacks on an enemy very quickly and kill them in 1-2 turns. However, the usual style of {{KW|Poison}} builds slowly ramp up stacks over time and whittle the enemy down over many turns. |
||
| ⚫ | * {{C|Catalyst}} |
||
| ⚫ | * {{C|Noxious Fumes}} on its own, will gradually build up more and more poison until the enemy dies. It allows many builds to play much more defensively, and stall out fights with full-defense turns, as they are passively dealing more and more damage. Synergizes amazingly with {{KW|Block}} Builds. However, this playstyle struggles with enemies that scale by buffing their own strength. {{C|Malaise}} is a great addition to a {{C|Noxious Fumes|Fumes}} build. |
||
| ⚫ | |||
| ⚫ | |||
| ⚫ | * {{C|Catalyst}}, if you're able to play it multiple times, can exponentially increase {{KW|Poison}} to ridiculous levels in a single turn. With {{C|Nightmare}} or {{C|Burst}} (or both), you get extra plays out of your {{C|Catalyst}}, which can quickly stack up hundreds of {{KW|Poison}}. This build has incredible single-target damage, but very bad at damaging multiple targets (without {{R|The Specimen}}), and requires a decent supply of draw/energy. Very good for all single-target encounters, and becomes worse the more enemies there are. |
||
| ⚫ | |||
** {{C|Bane}} |
** {{C|Bane}} |
||
** {{C|Deadly Poison}} |
** {{C|Deadly Poison}} |
||
| Line 49: | Line 60: | ||
** {{C|Crippling Cloud}} |
** {{C|Crippling Cloud}} |
||
| − | * {{C|Envenom}} |
+ | * {{C|Envenom}} adds {{KW|Poison}} onto all of your attack cards. Works extremely well if you are able to play many attack cards in a turn. Synergizes well with cheap attacks like {{C|Endless Agony}}, multiple-hit like {{C|Riddle with Holes}} and pretty much all {{C|Shiv}}-generating cards. |
| − | * {{C|Corpse Explosion}}- Very good AOE damage and allows the poison deck to kill multiple enemies at once. |
||
| + | * {{C|Corpse Explosion}} could help solve the lack of AoE damage of {{KW|Poison}}. |
||
| − | {{R|Snecko Skull}} |
||
| ⚫ | |||
| ⚫ | |||
| − | {{R|The Specimen}} |
||
| ⚫ | |||
| ⚫ | |||
| − | ==== '''Discard/Draw Builds''' ==== |
||
| + | |- |
||
| + | |} |
||
| + | |||
| + | {| class="mw-collapsible mw-collapsed" data-expandtext="▼" data-collapsetext="▲" style="border: 0px solid black; width: 100%;" |
||
| + | ! style="background-color: transparent; border: solid #008060; color: #008060; border-width: 0px 0px 1px 0px;" |<div style="color:#A1EC4C">[[Discard]] and [[Draw Card|Draw]] Deck</div> |
||
| + | |- |
||
| + | | style="background-color: transparent; border: solid #008060; border-width: 0px 0px 1px 0px;" | |
||
This build aims to cycle through your deck quickly to find the key cards needed to finish the fight. |
This build aims to cycle through your deck quickly to find the key cards needed to finish the fight. |
||
* Discard/Draw cards: these are the main cards in the deck that cycle through your deck for you: |
* Discard/Draw cards: these are the main cards in the deck that cycle through your deck for you: |
||
| Line 69: | Line 84: | ||
** {{C|Calculated Gamble}} |
** {{C|Calculated Gamble}} |
||
| − | * |
+ | * {{R|Tingsha}}/{{R|Tough Bandages}} deals 3 damage / grants 3 block on each discard. If you can get these relics, you can spam discard to fight for you. |
* {{C|Eviscerate}} |
* {{C|Eviscerate}} |
||
| − | * {{C|Tactician |
+ | * {{C|Tactician}} grants 1 (2) {{KW|Energy}} when discarded. If your deck can reliably discard {{C|Tactician}}, then it has a steady supply of {{KW|Energy}}, which makes most of your turns much more efficient. With a small enough deck, you can actually guarantee discarding {{C|Tactician}} multiple times, which can become Infinite. |
| − | * {{C|Reflex}} |
+ | * {{C|Reflex}} draws 1 (2) card when you discard. Fully upgraded {{C|Tactican}}{{C|Reflex}} combine with {{C|Prepared}}, upgraded {{C|Calculated Gamble}} and small deck, you can infinite your deck and 1-turn kill any enemy. Few {{C|Neutralize}} +{{C|Heel Hook}}, {{C|Sneaky Strike}}, and {{C|Eviscerate}} cards could provide enough damage.{{C|Backflip}} is also acceptable source of defense and {{C|Escape Plan}} is even better. |
| + | |- |
||
| + | |} |
||
| + | {| class="mw-collapsible mw-collapsed" data-expandtext="▼" data-collapsetext="▲" style="border: 0px solid black; width: 100%;" |
||
| − | ==== '''Momentum/Value/Ramp Builds''' ==== |
||
| + | ! style="background-color: transparent; border: solid #008060; color: #008060; border-width: 0px 0px 1px 0px;" |<div style="color:#A1EC4C">{{R|Unceasing Top|Momentum}} Deck</div> |
||
| − | * '''[[Unceasing Top]]: '''Whenever your hand is empty, draw 1 card. Allows you to play discard without fear of "running out of cards". If {{C|Concentrate}} is your last card, you get free energy by playing it and drawing. Deflect, Slice, and other 0-cost cards are much better, as they no longer lead to "dead hands". Unplayable cards, including {{KW|Status|Statuses}} & {{KW|Curse|Curses}}, can completely ruin the build. Be careful. |
||
| + | |- |
||
| + | | style="background-color: transparent; border: solid #008060; border-width: 0px 0px 1px 0px;" | |
||
| + | {{R|Unceasing Top}}: Whenever your hand is empty, draw 1 card. Allows you to play discard without fear of "running out of cards". This build also exploits Silent's relatively low cost of her cards, and her synergy with playing a large number of cards. |
||
| + | * If {{C|Concentrate}} is your last card, you get free energy by playing it and drawing. |
||
| + | * {{C|Deflect}}, {{C|Slice}}, and other 0-cost cards are much better in this build, as they do not lead to "dead hands". |
||
| + | * {{C|Adrenaline}} can generates {{KW|Energy}} in a pinch, allowing you to continue playing more cards. |
||
| + | * As this build revolves around playing a lot of cards, {{C|After Image}} and {{C|A Thousand Cuts}} becomes much more effective. |
||
| + | * Unplayable cards, including {{KW|Status|Statuses}} & {{KW|Curse|Curses}}, can completely ruin the build. Be careful. |
||
| + | ** Consider picking up {{R|Blue Candle}} and {{R|Medical Kit}} to help get rid of {{KW|Curse|Curses}} and {{KW|Status|Statuses}}, respectively. |
||
| + | |- |
||
| + | |} |
||
| + | {| class="mw-collapsible mw-collapsed" data-expandtext="▼" data-collapsetext="▲" style="border: 0px solid black; width: 100%;" |
||
| − | ==== '''Shiv Builds''' ==== |
||
| + | ! style="background-color: transparent; border: solid #008060; color: #008060; border-width: 0px 0px 1px 0px;" |<div style="color:#A1EC4C">{{C|Shiv}} Deck</div> |
||
| ⚫ | |||
| + | |- |
||
| ⚫ | * {{C|Infinite Blades}}, {{C|Cloak |
||
| + | | style="background-color: transparent; border: solid #008060; border-width: 0px 0px 1px 0px;" | |
||
| ⚫ | |||
| ⚫ | |||
| ⚫ | |||
| ⚫ | * {{C|Infinite Blades}}, {{C|Cloak and Dagger}}, {{C|Blade Dance}} are absolute musts for the archetype. All add {{C|Shiv|Shivs}} to your hand. Amplified by strength cards and relics ( i.e. {{C|J.A.X.}}, {{R|Shuriken}}, {{R|Kunai}}, {{R|Ornamental Fan}}). Don't forget to upgrade {{C|Infinite Blades}} first so it appear innately on your hand. |
||
| ⚫ | |||
| ⚫ | |||
| ⚫ | * {{C|Envenom}} |
||
| ⚫ | |||
| ⚫ | |||
| ⚫ | |||
| ⚫ | |||
| ⚫ | * {{C|Envenom}} applies {{KW|Poison}} while you attack with barrages of {{C|Shiv|Shivs}}. Couple with the {{R|Snecko Skull}} relic for easy clears.{{C|Sadistic Nature}} also combines extremely effectively with it; the {{KW|Poison}} from {{C|Envenom}} will trigger the damage from {{C|Sadistic Nature}}. This strategy can serve as a bridge between {{KW|Poison}} and {{C|Shiv}} builds in case you end up with a mix of cards and relics suitable for each. |
||
| ⚫ | |||
| ⚫ | |||
| ⚫ | |||
| ⚫ | |||
| ⚫ | |||
| ⚫ | |||
| ⚫ | |||
| ⚫ | |||
| ⚫ | |||
| ⚫ | |||
| ⚫ | |||
| ⚫ | |||
| ⚫ | |||
| ⚫ | |||
| + | * Since you will be playing a lot of {{C|Shiv}}, which is an [[Attack]], you will trigger relics like {{R|Ornamental Fan}}, {{R|Nunchaku}}, {{R|Kunai}}, and {{R|Shuriken}} many times. |
||
| + | |- |
||
| + | |} |
||
| + | {| class="mw-collapsible mw-collapsed" data-expandtext="▼" data-collapsetext="▲" style="border: 0px solid black; width: 100%;" |
||
| − | ==== ==== |
||
| + | ! style="background-color: transparent; border: solid #008060; color: #008060; border-width: 0px 0px 1px 0px;" |<div style="color:#A1EC4C">{{C|Grand Finale}} Deck</div> |
||
| ⚫ | |||
| + | |- |
||
| ⚫ | |||
| + | | style="background-color: transparent; border: solid #008060; border-width: 0px 0px 1px 0px;" | |
||
| ⚫ | |||
| ⚫ | |||
| ⚫ | |||
| ⚫ | |||
* Having cards that can draw different amount of cards will also help you get your draw pile to 0: |
* Having cards that can draw different amount of cards will also help you get your draw pile to 0: |
||
| − | ** {{C|Escape Plan}}/{{C|Prepared}} |
+ | ** {{C|Escape Plan}}/{{C|Prepared}}/{{C|Quick Slash}}: 1 |
| − | ** {{C|Backflip}}/{{C|Adrenaline}}/{{C|Prepared|Prepared+}} |
+ | ** {{C|Backflip}}/{{C|Adrenaline}}/{{C|Prepared|Prepared+}}: 2 |
| − | ** {{C|Acrobatics}} |
+ | ** {{C|Acrobatics}}: 3 |
| + | ** {{C|Acrobatics|Acrobatics+}}: 4 |
||
| − | ** {{C|Expertise}}- Your current hand size |
+ | ** {{C|Expertise}}: 6 - Your current hand size |
| + | ** {{C|Expertise|Expertise+}}: 7 - Your current hand size |
||
| + | |||
| + | * The Gambler's Brew potion - which allows you to discard any number of cards, then draw that many can also be used on a one-off basis to reduce your draw pile to exactly zero. |
||
| + | |- |
||
| + | |} |
||
== Unlocks == |
== Unlocks == |
||
| + | The Silent is unlocked by completing a run with The Ironclad. |
||
{| class="article-table" |
{| class="article-table" |
||
!Unlock Number |
!Unlock Number |
||
| Line 114: | Line 158: | ||
|- |
|- |
||
|2nd |
|2nd |
||
| − | | |
+ | |{{R|Du-Vu Doll}}, {{R|Smiling Mask}}, {{R|Tiny Chest}} |
|- |
|- |
||
|3rd |
|3rd |
||
| − | |{{C|Cloak |
+ | |{{C|Cloak and Dagger}}, |
{{C|Accuracy}}, |
{{C|Accuracy}}, |
||
{{C|Storm of Steel}} |
{{C|Storm of Steel}} |
||
|- |
|- |
||
|4th |
|4th |
||
| − | | |
+ | |{{R|Art of War}}, {{R|The Courier}}, {{R|Pandora's Box}} |
|- |
|- |
||
|5th |
|5th |
||
| Line 131: | Line 175: | ||
==Gallery== |
==Gallery== |
||
| − | <gallery> |
+ | <gallery bordercolor="#69F073"> |
soylent1.jpg|The Silent in-game |
soylent1.jpg|The Silent in-game |
||
soylent2.jpg|The Silent appearing in her Steam Background |
soylent2.jpg|The Silent appearing in her Steam Background |
||
Revision as of 11:29, 14 May 2020
The Silent is one of four playable characters in Slay the Spire. She is a huntress themed on a rogue fantasy build. This cunning character weakens her foes with numerous cuts and poison, while using cheap tricks and agility to avoid their attacks. With many powerful cards that draw and discard, the Silent ensures that she will always be one step ahead of her enemy. She starts with a relatively low 70 hp.
The Silent's starting Relic is ![]() Ring of the Snake, which draws 2 additional cards when starting combat.
Ring of the Snake, which draws 2 additional cards when starting combat.
Cards
Starting Deck
- 5 Strikes
- 5 Defends
- 1 Survivor
- 1 Neutralize
| Starters | |||
|---|---|---|---|
| Attacks | Common
|
Bane • Dagger Spray • Dagger Throw • Flying Knee • Poisoned Stab • Quick Slash • Slice • Sneaky Strike • Sucker Punch
| |
Uncommon
|
All-Out Attack • Backstab • Choke • Dash • Endless Agony • Eviscerate • Finisher • Flechettes • Heel Hook • Masterful Stab • Predator • Riddle with Holes • Skewer
| ||
Rare
|
|||
| Skills | Common
|
||
Uncommon
|
Blur • Bouncing Flask • Calculated Gamble • Catalyst • Concentrate • Crippling Cloud • Distraction • Escape Plan • Expertise • Leg Sweep • Reflex • Setup • Tactician • Terror
| ||
Rare
|
|||
| Powers | Uncommon
|
||
Rare
|
|||
Strategy
Unlike the Ironclad, the Silent does not get any healing whenever she finishes combat. Therefore she is often more focused on ![]() Block, and gaining explosive advantage so that she can end the encounter faster. Many of her cards give additional Energy and card draw, allowing her to chain momentum together to overcome the lack of built-in healing.
Block, and gaining explosive advantage so that she can end the encounter faster. Many of her cards give additional Energy and card draw, allowing her to chain momentum together to overcome the lack of built-in healing.
Starting Deck
The Silent's starting deck is the largest of the 4 characters, at 12 cards, compared to the Ironclad's, Defect's and Watcher's starting deck, each of which have 10 cards. This means more Strikes and Defends are encountered in Act 1, and it's slightly more difficult to remove all starting cards from The Silent's Deck.
- The Silent's starting deck is also the cheapest, with its 2 non-Strike non-Defend cards costing 1 and 0. This means it's easier to take strong 2-cost card options earlier in the game, such as Dash, Predator, and Leg Sweep.
Starting Relic
The Silent's starting Relic, ![]() Ring of the Snake ensures that the first turn of every fight is slightly stronger than all of the other turns. This makes Innate cards slightly better for Silent since they only take up 1 of 7 cards instead of 1 of 5 cards.
Ring of the Snake ensures that the first turn of every fight is slightly stronger than all of the other turns. This makes Innate cards slightly better for Silent since they only take up 1 of 7 cards instead of 1 of 5 cards.
General Build Archetypes
These are the standard types of decks that may give you an idea of direction for your deck, or what you want to go for. Keep in mind that none of these builds are mutually exclusive. Many of them are more of a general strategy, which can be adapted or combined into multiple builds in a single deck
|
|
|
|
|
This build aims to cycle through your deck quickly to find the key cards needed to finish the fight.
|
|
|
Shiv Deck
|
|---|
|
A primarily damage-focused build that revolves around gaining and using many Shivs during each combat. The Silent also has a few Relics that are specifically for enhancing Shivs.
|
Grand Finale Deck
|
|---|
|
Grand Finale deck is a niche combo deck, and requires most or all of the deck to be built around it to work. Also there are a few cards needed specifically to make it work.
|
Unlocks
The Silent is unlocked by completing a run with The Ironclad.
| Unlock Number | Prizes Unlocked |
|---|---|
| 1st | Bane, |
| 2nd | |
| 3rd | Cloak and Dagger, |
| 4th | |
| 5th | Concentrate, |

